
Nail art is not just a trend; it’s an expression of your personality and creativity! With DIY nail decorations, you can transform your basic nails into stunning works of art that will make your friends green with envy. From simple techniques that take only minutes to more intricate designs that will showcase your artistic flair, there’s something for everyone in this list.
Whether you’re preparing for a special event or just want to treat yourself, these DIY nail decorations will elevate your manicure game. Let’s dive into a world of colors, textures, and eye-catching designs that will inspire you to experiment with your nails like never before!
Contents
- 1. Marble Effect Nails
- 2. Glitter Ombre Nails
- 3. Floral Nail Art
- 4. Geometric Nail Design
- 5. Metallic Foil Accents
- 6. Watercolor Nails
- 7. Patterned Nail Wraps
- 8. Foil Transfer Art
- 9. Nail String Art
- 10. Dot Nail Art
- 11. Negative Space Design
- 12. Rhinestone Nail Art
- 13. Nail Art Pens
- 14. Seasonal Nail Themes
- 15. Reverse French Manicure
1. Marble Effect Nails
Marble nails are a chic way to achieve a sophisticated look right at home. All you need are a few basic colors along with a small dish of water to create this elegant effect. Start by applying a base coat, then drop small blobs of nail polish into the water. Using a toothpick, swirl the colors together to mimic the natural veins found in marble. Once you’re satisfied with the design, dip your nail in, and voilà!
For a perfect finish, consider using Sally Hansen Insta-Dri, clear top coat to seal your design and give it that glossy shine. This quick-dry formula helps lock in your hard work and ensures your masterpiece lasts longer.
Don’t hesitate to experiment with different color combinations; pastel shades can create a soft look while bold colors make a statement. A great option for variety is the Morovan nail polish set, which includes 15 bright colors to enhance your creativity.
Lastly, remember to work quickly, as nail polish can dry fast in water. Using tools can make a significant difference, so consider picking up a set of nail art tools, which include toothpicks for swirling. These brushes can help you achieve more precise designs and elevate your nail art game. Enjoy creating your marble effect nails!
2. Glitter Ombre Nails
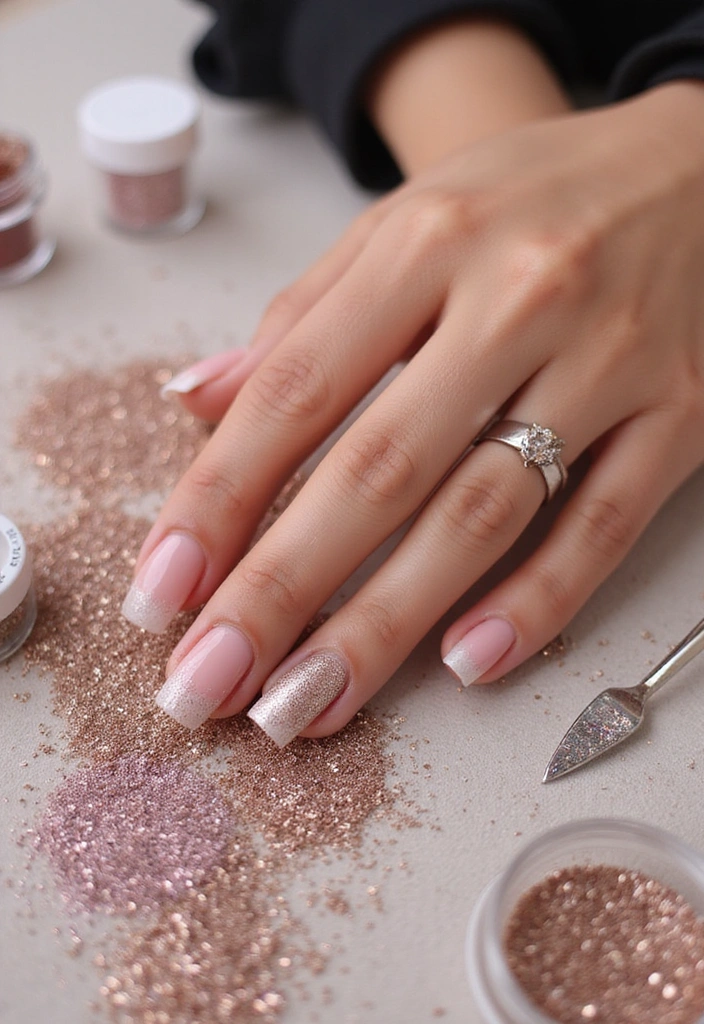
Glitter ombre nails are the perfect choice when you want to shimmer and shine! This technique adds a touch of glam to any outfit. Start with a base color of your choice, allowing it to dry fully. Then, using a makeup sponge, like the Amazon Basics cosmetic foam wedges for makeup, apply glitter polish starting from the tips of your nails and fading it down toward the base.
For an effortlessly blended look, dab the sponge gently to avoid harsh lines. To enhance your sparkle, consider using wet n wild Wild Shine nail polish, kaleidoscope, glitter top coat for a fine glitter finish. If you prefer a bolder effect, try using L.a. COLORS glitter vibes polish, golden glow for chunky glitter.
To lock in the sparkle, finish with a top coat. Pro tips:
– Use fine glitter for a more subtle sparkle or chunky glitter for a bolder effect.
– You can create gradient effects by mixing different glitter shades.
– Ensure you clean up any excess glitter on your skin for a polished finish!
3. Floral Nail Art
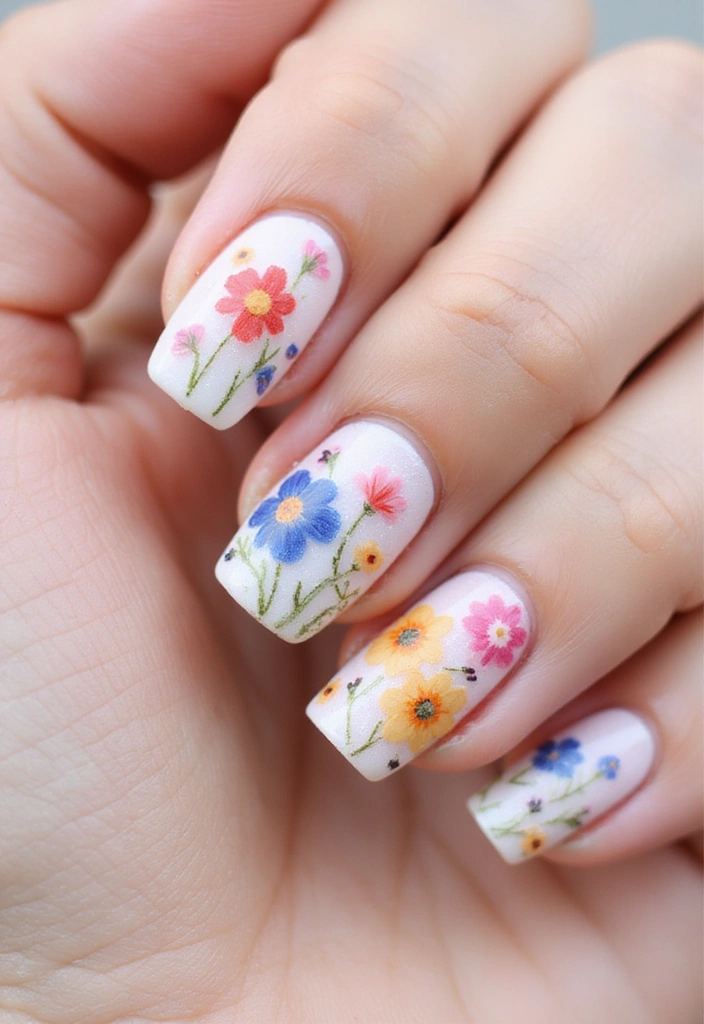
Floral nail art is timeless and perfect for any season! Creating a floral design can be as simple or as intricate as you want. Start with a solid base color, and once it’s dry, use a thin nail art brush or dotting tool to paint small flowers using vibrant colors. For this, consider using the Nail Art Brush Set, which includes various brushes ideal for detailed designs, or the Dotting Tool Set to create precise flower shapes with ease.
Mix and match different flower shapes and colors for a stunning bouquet effect. If you’re looking for a quicker option, try out Nail Art Stickers for an effortless floral touch that can transform your nails in no time!
Helpful insights:
– Use a clear top coat to add shine and protect your artwork.
– Try using a contrasting color for the center of your flowers for extra pop.
– Practice makes perfect; don’t be afraid to do a few trial runs!
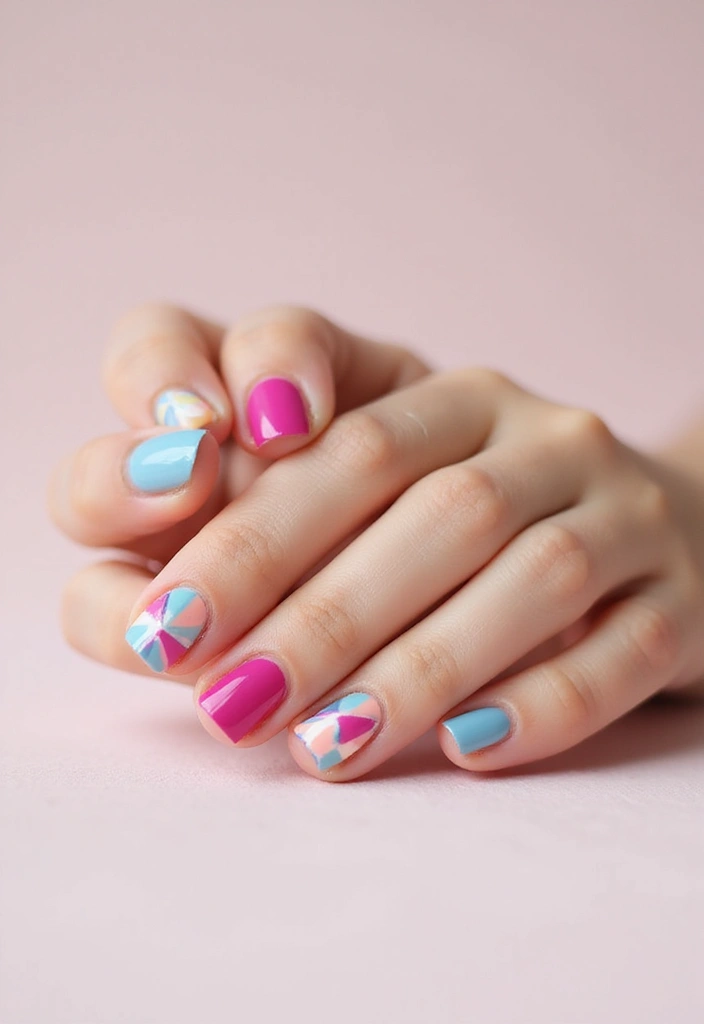
4. Geometric Nail Design
Geometric patterns are super trendy and can be easily achieved with a bit of patience. Start by painting your nails with a solid base color. Once dry, use striping tape like Teenitor Nail Art Brushes, 3D Nail Art Painting Polish Design Kit to create shapes like triangles and lines. This striping tape is perfect for ensuring clean edges and precise lines, making your geometric design stand out. Alternate colors to make your design pop.
This style is modern and works well for both casual and formal occasions.
Pro tips:
– Use a quick-drying top coat to avoid smudging your design.
– Don’t worry about perfection; the beauty of geometric designs lies in their unique imperfections.
– Experiment with negative space for a contemporary twist.
To take your nail art to the next level, consider adding Beetles 31pcs Nail Art Brushes to your toolkit. This comprehensive set includes various tools that help you create intricate designs with ease, perfect for beginners and seasoned artists alike. With these brushes, your designs will remain crisp and detailed, enhancing the overall look of your geometric masterpiece.
5. Metallic Foil Accents
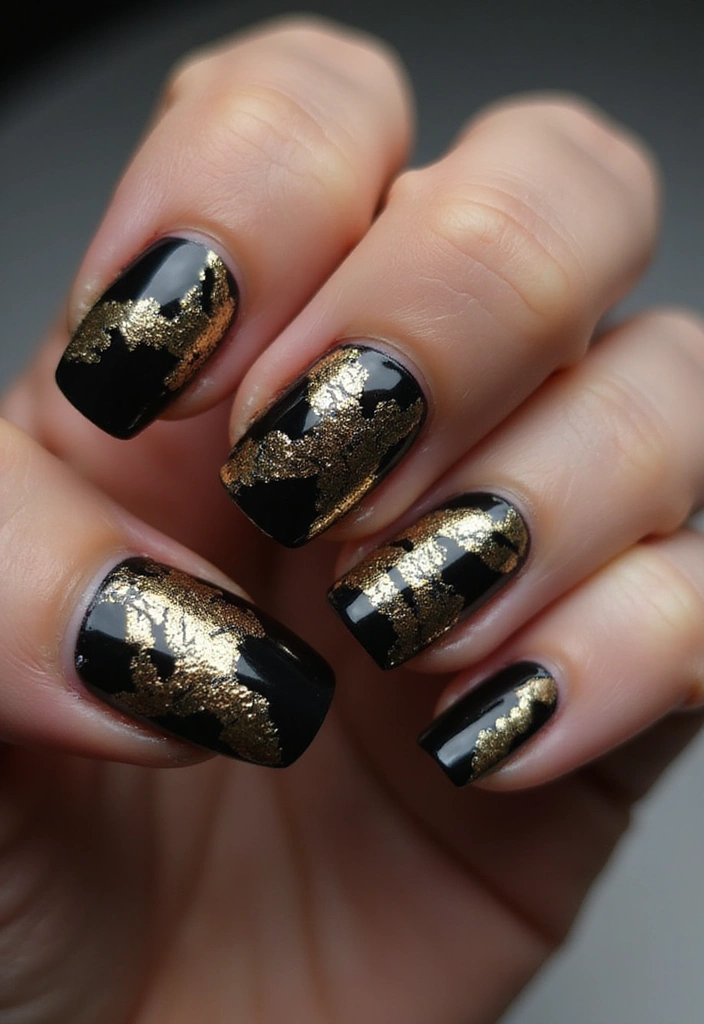
Metallic foil accents can take your nails from ordinary to extraordinary! These shiny bits can be added to any nail design for a luxe touch. Start with a base color, and once it’s dry, apply a layer of nail glue, like Nail Glue for Foil Application, where you want the foil. This specially designed foil glue ensures that the foil adheres perfectly, so make sure it’s tacky before applying for optimal results. Then, gently press the foil onto the glue for an eye-catching look.
After that, finish with a top coat, such as Top Coat for Nail Art, to keep everything intact and give your design a beautiful, long-lasting shine.
For success:
– Gold and silver foils are classic options, but experimenting with rose gold or holographic foils from sets like Metallic Nail Foil Set can add a fun twist to your nail art.
– Don’t hesitate to mix different foil colors for a unique design that will surely make you the envy of all your friends!
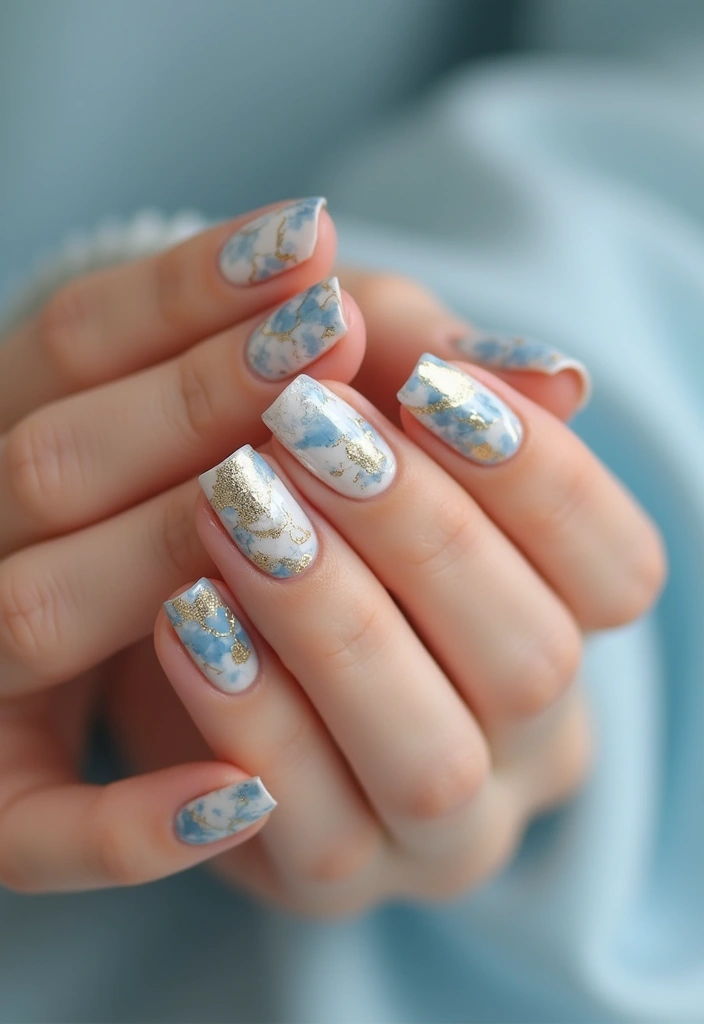
6. Watercolor Nails

Watercolor nails are fun and give a soft, dreamy vibe to your manicure. To achieve this look, start with a nude or white base. Using a small brush or sponge, like those from the Nail Art Brush Set, apply different shades of nail polish in a watercolor effect. Blend the colors together while they are still wet for that fluid look.
For the polish, consider using a range of shades from the Pastel Nail Polish Set for a softer appearance, or opt for brighter colors if you’re aiming for a bold statement. Finish with a glossy top coat to enhance the wet effect.
Helpful hints:
– Less is more; using too many colors can make the design appear muddy.
– For a unique twist, consider adding a subtle shimmer top coat.
7. Patterned Nail Wraps
Patterned nail wraps are the ultimate time-saver for perfect nails! These self-adhesive stickers come in a vast range of designs and patterns. Simply choose your favorite set, peel the wrap, and apply it to your nail. For a perfect fit, file away the excess at the tip using a nail file. A 4 way nail buffer, like the one available in a pack of four, will help you achieve a smooth finish for your nails before applying the wraps.
They are not only easy to apply but also long-lasting! To ensure the best adhesion, make sure your nails are clean and dry before applying the wraps. For a more durable finish, consider applying a top coat over the wraps, such as Sally Hansen Double Duty, which provides a quick-dry, long-lasting, streak-free shine.
Additionally, don’t hesitate to mix and match different patterns for a fun, eclectic look. With the right tools and products, you’ll be able to show off your beautifully decorated nails with confidence!
8. Foil Transfer Art
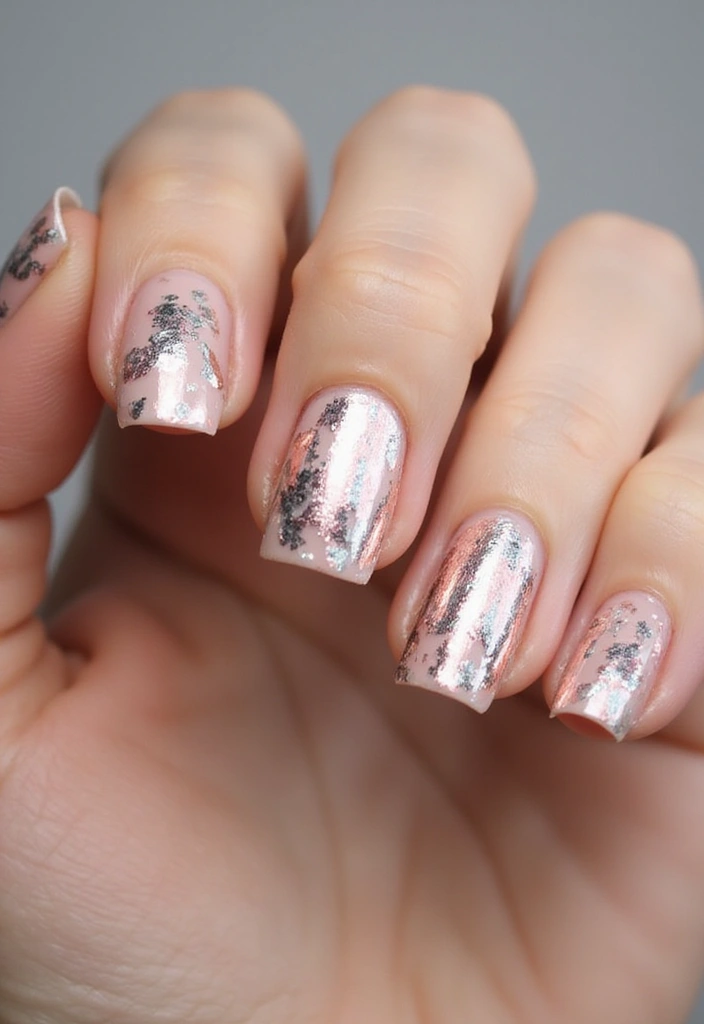
Foil transfer art takes the shine of metallic foil to a whole new level. With this technique, you can create intricate designs on your nails using Foil Transfer Gel. Start by applying the gel in your desired pattern and cure it under a UV Nail Lamp. This step is crucial as the lamp ensures that the gel sets properly for the best results.
Next, place the foil over the gel and rub it in gently. Once you’ve done that, peel away the excess foil to reveal your beautiful design!
Pro tips:
– Experiment with different colors and patterns to find what suits your style.
– Ensure the gel is adequately cured for stunning results.
– Level up your game by adding some Nail Art Rhinestones to your design for extra sparkle. These rhinestones can add an eye-catching dimension to your nail art, making it even more impressive.
9. Nail String Art
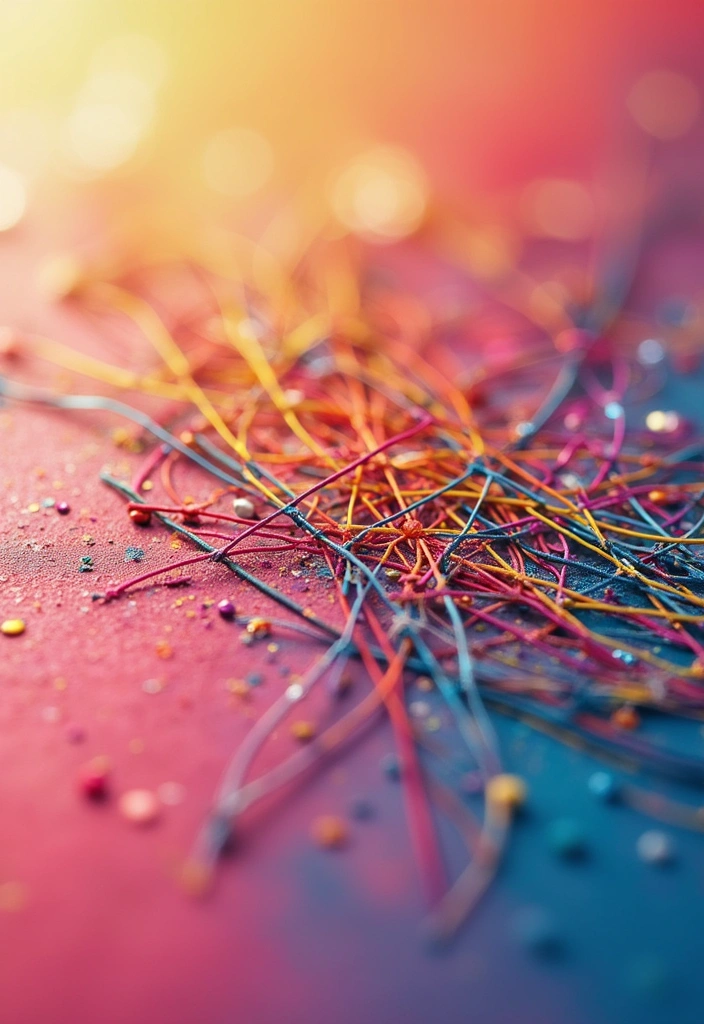
Nail string art is a unique and creative way to add texture to your nails. Using a thin brush or a nail art striper, you can paint fine lines or create shapes with nail polish in different colors. For this, the Nail Art Striper Brush Set is perfect, as it includes three brushes designed specifically for long lines and fine details, helping you achieve the precision needed for intricate designs.
Once your base color is dry, draw several lines across your nails, crisscrossing them to create an abstract design. Choosing contrasting colors will enhance the visual impact, so consider using the nail polish in various colors set, which offers a vibrant selection to ignite your creativity.
This technique allows for endless possibilities, so don’t hesitate to practice on paper before applying it to your nails to perfect your steady hand. To finish off your masterpiece, apply a top coat for a smooth surface and added durability. The top coat nail polish from Sally Hansen will provide quick-dry protection and a streak-free shine, ensuring your beautiful design lasts longer.
10. Dot Nail Art
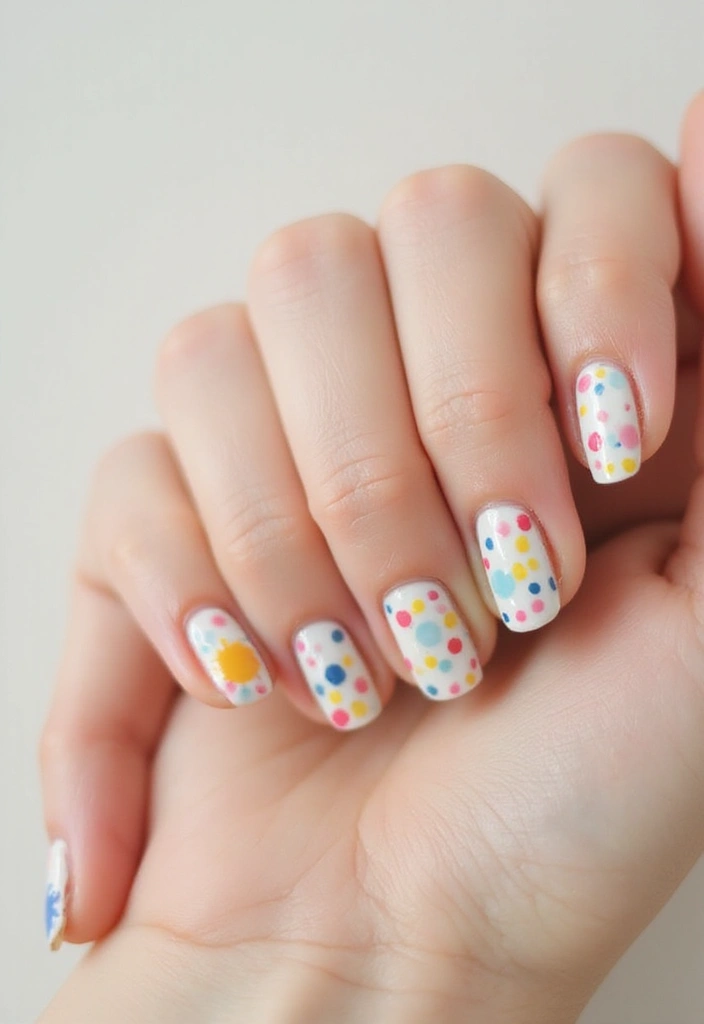
Dot nail art is an easy and fun way to create patterns without the need for advanced skills. Using a dotting tool or even a bobby pin, you can apply dots of various colors onto your nails to create flowers, polka dots, or even abstract designs. To make your dotting experience seamless, consider the Dotting Tool Set, which includes multiple sizes to help you achieve the perfect dot size for your designs.
For a playful look, use a variety of colors from a nail polish set that offers an array of shades. This will not only brighten up your nails but also allow you to experiment with different combinations and styles.
Remember to let each layer dry before adding more dots to avoid smudging. Once you’re satisfied with your design, don’t forget to seal it with top coat nail polish to ensure longevity and a streak-free shine. It’s a simple yet effective technique that can truly elevate your nail game!
11. Negative Space Design
Negative space designs are all about the nail polish you choose to leave off. This stylish technique highlights your natural nail while incorporating design elements. Start with a base coat, and then use tape to create geometric shapes or lines, leaving some areas bare. A great tool for this is nail art tape, which allows you to achieve clean lines and precise shapes for your design. Once your design is painted, remove the tape, and you’ll have a chic, modern look!
For your design, consider using a bold color that makes a statement against your natural nail, such as those found in the bold nail polish set. This set includes a range of vibrant shades, perfect for adding that pop of color to your negative space design.
Don’t forget about the importance of maintaining well-shaped nails for a polished finish. A good set of nail file and buffer is essential for keeping your nails in top condition. With these simple tools, you can create various designs with ease, so feel free to experiment with your own style!
12. Rhinestone Nail Art

Rhinestone nail art is the ultimate way to add bling to your manicure! After applying your base color and allowing it to dry, use nail glue like KISS PowerFlex Maximum Speed Nail Glue to attach rhinestones in your desired patterns. This fast-drying adhesive is perfect for securing your nail gems, ensuring they stay in place while you show off your dazzling manicure.
You can create flowers, lines, or even sparkly accents on individual nails with a versatile Rhinestone Nail Art Kit, which includes 2400 flatback rhinestones in various sizes. Mixing different sizes will add depth and dimension to your designs, making your nails truly stand out.
For precise placement, consider using a pair of Precision Tweezers. This upgraded set of anti-static stainless steel tweezers allows you to carefully position each rhinestone exactly where you want it, helping to create that polished look.
Finish your masterpiece with a top coat to secure the gems for long-lasting shine. Additionally, choose a color scheme that complements your outfit for a cohesive look. Your friends will definitely be envious of your fabulous nail art!
13. Nail Art Pens
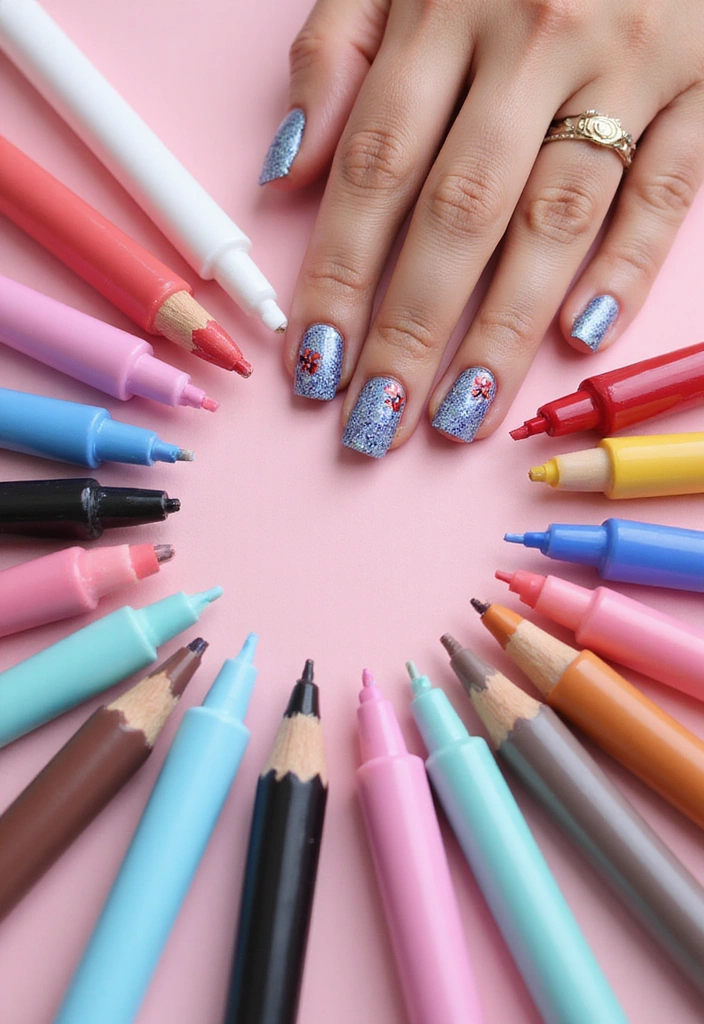
Nail art pens are a game-changer for DIY enthusiasts! These tools allow for more controlled application of designs, making it easier to transform your nails into a work of art. Simply apply your base coat using a reliable product like Sally Hansen Double Duty™, base and top coat, which provides quick-drying, long-lasting coverage and a streak-free shine. After that, use the pen to draw directly onto your nails. You can create fine lines, intricate patterns, or even write words and phrases to express your mood!
Once you’ve finished your design, seal it with a top coat for a polished look.
For the best results:
– Allow each layer to dry before adding more details.
– Choose pens with fine tips for detailed work, such as the nail art pens set, which offers 12 colors and a fine 0.5 MM tip perfect for intricate designs.
– Practice your designs on paper first to build confidence, and consider using a nail art practice wheel to experiment with different colors and styles before applying them to your nails.
With these tools, you’ll be well on your way to creating stunning nail art that your friends will envy!
14. Seasonal Nail Themes
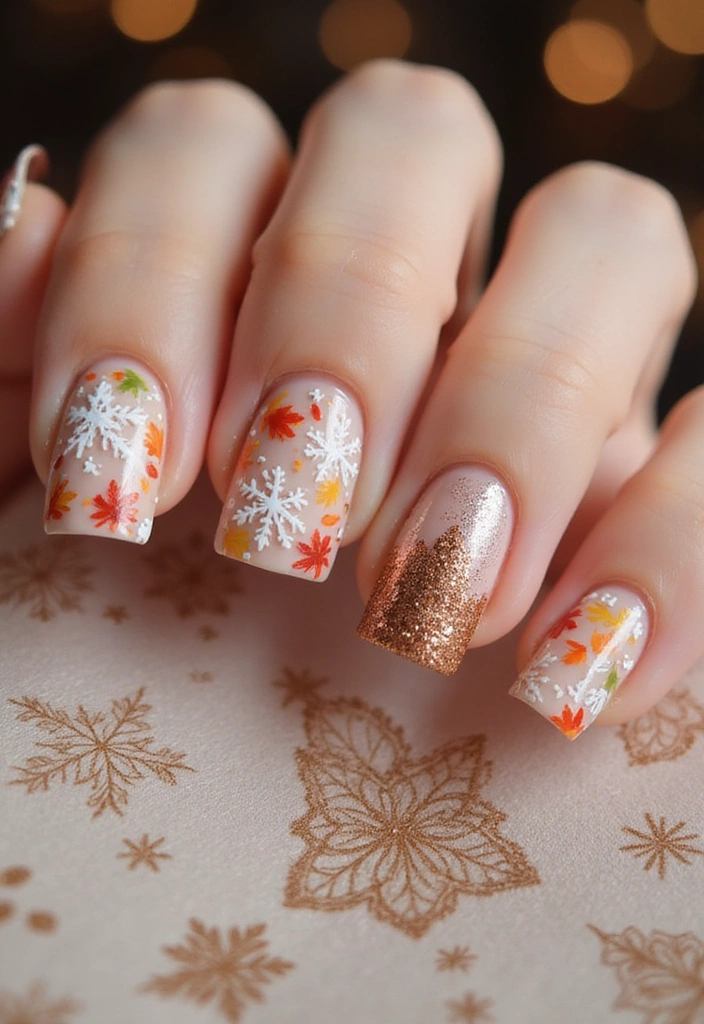
Why not celebrate the seasons with themed nail art? From autumn leaves to winter snowflakes, seasonal designs allow you to express your creativity throughout the year. Start with a solid base color and add seasonal elements using a fine brush or dotting tool. The Nail Art Brush Set is perfect for creating those intricate details, while the Dotting Tools for Nail Art will help you easily add small dots and designs that bring your seasonal themes to life.
These designs not only look great but also keep your nails fresh and fun! Don’t forget to incorporate small details like glitter or foil to elevate your designs. The Nail Glitter and Foil Set offers a variety of sparkly elements that can enhance your seasonal nail art, providing that extra flair.
Things to remember:
– Use colors that reflect the season; warm shades for fall and cool tones for winter.
– Share your seasonal nail art on social media to inspire others!
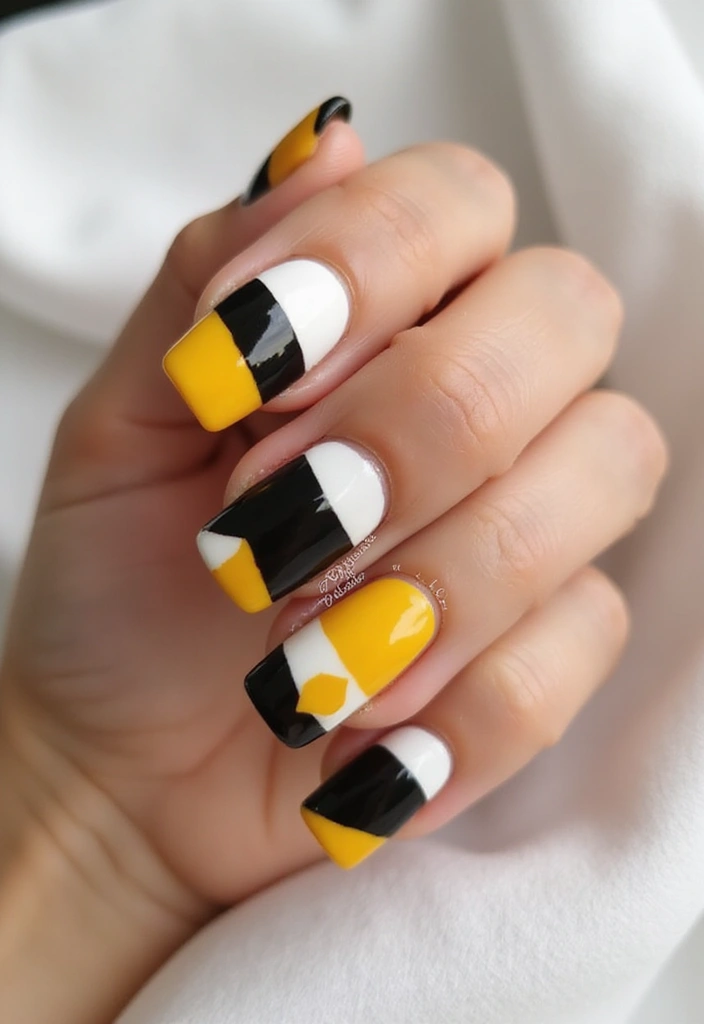
15. Reverse French Manicure
The reverse French manicure is a trendy twist on the classic look. Instead of traditional white tips, this design features a color block at the cuticle area. Start with a base color and then use tape, like this Nail Art Tape, to outline the desired shape at the cuticle. This tape is perfect for achieving clean lines and precise shapes, ensuring your design looks polished and professional. Fill in the area with your chosen color from a set like the Nail Polish Set (Contrasting Colors), which offers a variety of bold hues to create a striking look. Once everything is dry, remove the tape to reveal your masterpiece.
It’s modern and chic!
Key tips:
– Choose contrasting colors for a bold statement.
– Play with shapes and angles for a unique twist.
– Pair with a glossy top coat, such as the Glossy Top Coat, for a sleek finish that enhances the overall look and ensures longevity.
With these products, you’re all set to impress your friends with your stylish DIY reverse French manicure!
Conclusion

DIY nail decorations are an amazing way to express yourself while having fun! From shimmering glitter to stunning floral designs, there’s no limit to what you can create. Try out these ideas and let your nail art skills shine.
Don’t forget to share your creations with your friends and inspire others to get crafty with their nails!
Note: We aim to provide accurate product links, but some may occasionally expire or become unavailable. If this happens, please search directly on Amazon for the product or a suitable alternative.
This post contains Amazon affiliate links, meaning I may earn a small commission if you purchase through my links, at no extra cost to you.